
Whatever landscaping project you undertake, you have to determine a few things before you begin. You have to know how you want to use it. If you’re building an outdoor cooking area, then you must determine whether it is for full-scale outdoor dining or not. It can be for intimate family gatherings along with a few guests. Or you need it for occasional weekend go-getters.
Regardless of your purposes, outdoor kitchens require a structure to house the griller. Here you will find some cost-effective and simple ways of building that housing unit by yourself. If you want, then you can add an under-counter fridge, a prep sink, a rotisserie, and any other storage area. The designs described here will leave spaces for those features along with the installation of additional bays.
You have to invest twenty-four to thirty hours into this project. Before you begin, you have to design the layout of the kitchen. After that, you must excavate the area and pour a concrete slab if necessary.
Mortared cooking area
The necessary tools
-
Tape measure
-
Shovel
-
Hammer
-
Rake
-
Power tamper
-
Mason’s trowel
-
Chalk line
-
Concrete finishing tools
-
Hacksaw
-
Cordless drill
-
Wire cutters
-
Notched Trowel
-
Circular saw with a masonry blade
-
Two stocks for forms
-
A backer-board
-
Concrete blocks
-
Mortar
-
Ready-mix concrete
-
Deck screws
-
Line blocks
-
Metal Lath
-
Thin-set mortar
-
Line blocks
-
3/4-inch exterior-grade plywood
-
Brick veneer
-
Tiles
-
Grout
The Steps
-
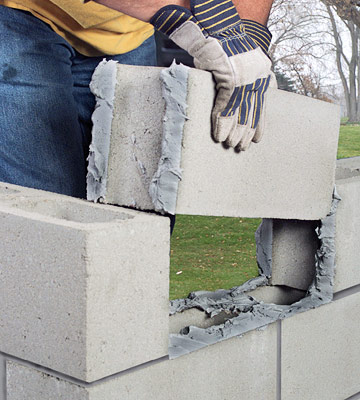
Lay out and pour the slab
Pour the slab and lay out the footings as per the local codes. Snap a few chalk lines to mark the areas for block walls. Build the walls as per your dimensional plan. You must ensure that the bay of the grill meets the specifications of the manufacturer.

-
Install backer-board and plywood
Now you will cut the metal lath, ¾-inch exterior-grade plywood, and backer-board while matching with each section of the countertop. Use concrete screws to fasten the plywood to the block webs. Apply mortar on the plywood and set the first back-board in the mortar. Once done, install the metal lath and the next backer-board.

-
Level and set veneer
Start at the bottom, spread and comb the thin-set on an area of the block wall. Using slight twists set each piece of brick veneer in the mortar. Now, level the surfaces and maintain a straight line with a straightedge.

-
Mortar application
After the thin-set cures, fill up the mortar bag with the mortar as suggested by the manufacturer. Squeeze the mortar into the joints and allow it to set up slightly. Then you will tool it with a jointing device.
-
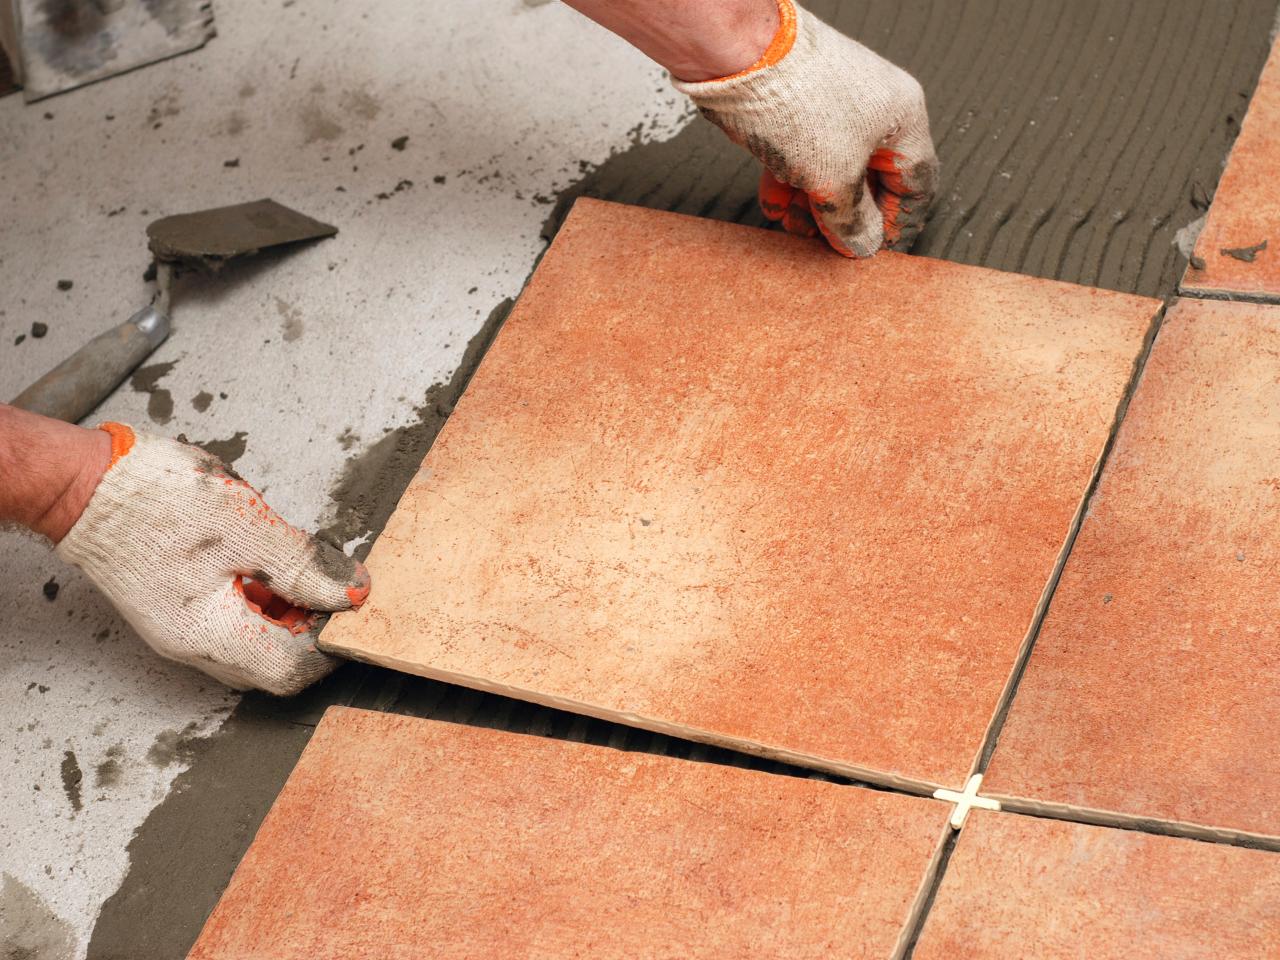
Laying the tiles
You must dry-lay the countertop tiles to ensure that everything fits. After that, spread and comb one level coat of thin-set on the backer-board and set the field tiles on the countertop. You have to make sure that all the joints stack up against each other. Then you will set the edge tile and wait for the mortar to cure. Finally, you will apply grout and clean the tiles and install the griller.


